
Here’s a TL:DR; for people who don’t have time for prose: Jump to the install
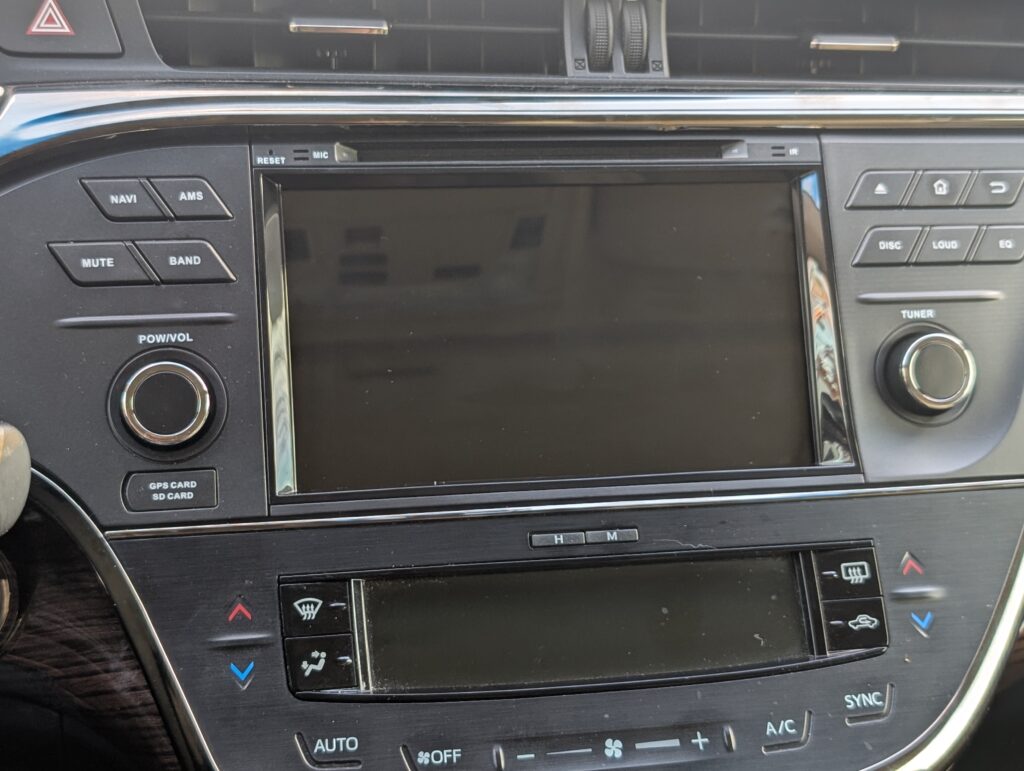
I fell in love with my Avalon the day I drove it home. It’s a brilliant automobile, and packed with luxury features that I truly enjoy. Mine is a 2013 Limited, with the JBL sound system, and navigation in the dash — The very best that 2013 technology had to offer.
In other words, the 2013 head unit and navigation is antiquated old crap that is largely proprietary and challenging to upgrade without losing functionality. Want updated maps? $800 at the dealership, even though you know it should just be a simple file update. Computers are not mysterious. But even with current map data, the interface is still reminiscent of the early days of mobile phones where you have to peck a number three times to add a letter to your text message. Garbage.
I won’t belabor the point, but I had a lot of trouble finding a replacement head unit that would work with the JBL. There were some options, but they didn’t come with the trim, and the only dash kit I could find was some glossy black plastic that just wasn’t the look I was going for. And those solutions have you perform surgery on the old radio to harvest the passenger airbag indicator light. I wanted something easier.
And then I found… Belsee Android Head Unit for 2013-2018 Toyota Avalon which had support for JBL 🎉 Great! I ordered it, and one month later (to the day) I was finally installing it. I had some trouble creating an account on the Belsee site, or more accurately, the account was created, I just couldn’t log in or reset my password. When I inquired, Belsee was very responsive confirming my order, and followed up with tracking information when it shipped.
The radio came by UPS express, and was packaged securely in foam. There was the head unit, already outfitted with the dash trim just as you see, and lots of colorful wires with connectors of diverse shape. Also, there was no documentation whatsoever. The wires had little white labels on many of them. An email to tech support yielded a PDF with information about settings in the installed apps, but nothing about mapping the ports on the back of the radio, which wires to use, etc.
Installation:
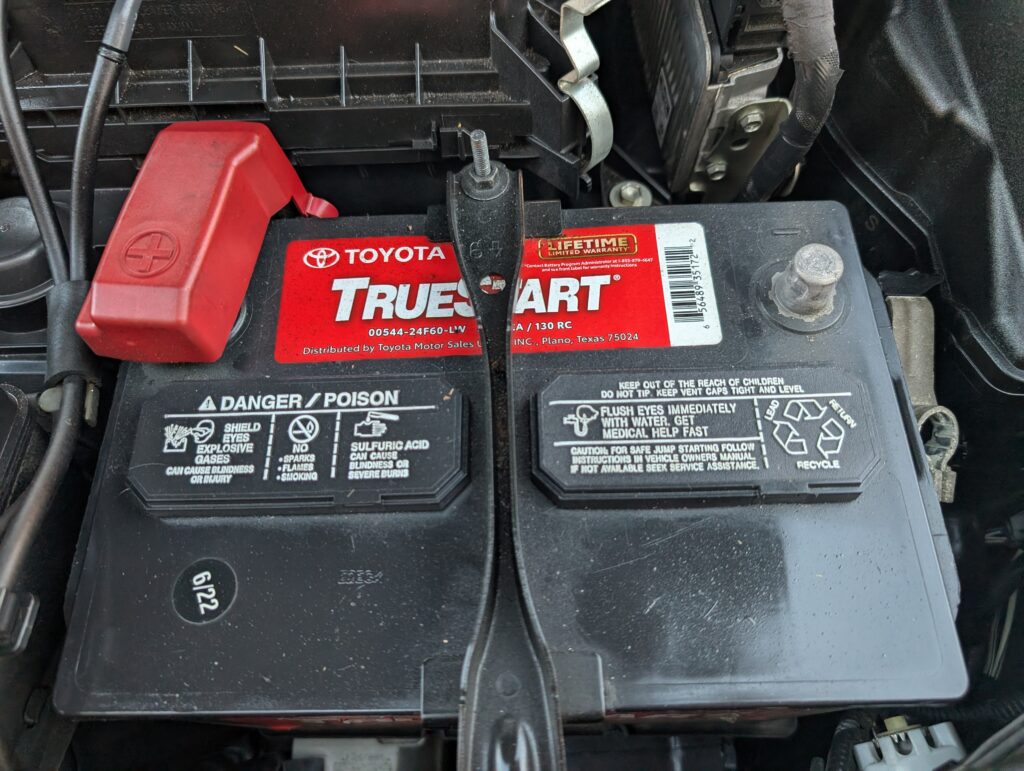
- 1. Disconnect the negative terminal of the battery.
- 2. Remove dash trim, working right to left.
- 3. Remove lower panel above the center console.
- 4. Disconnect plug from air controls.
- 5. Remove top radio 10mm bolts.
- 6. Remove lower 10mm bolts.
- 7. Lay towels over anything you don’t want scratched up.
- 8. Work the radio forward and out of the dash. Unplug all the wires.
- 9. Lay the radio face-down on a soft surface.
- 10. Disconnect chrome trim by removing end screw, center screw, and pulling down to disconnect the yellow trim plug. Disconnect the mounting brackets.
- 11. Disconnect the air control module by sliding it to the right and down. Don’t force anything.
- 12. Connect the interface harness to the plugs in the dash.
- 13. Identify and connect the various plugs to the back of the new head unit for testing in the car.
- 14. Plug the interface harness into the head unit and port wires. There will be some wires that have no matching plug on the interface.
- 15. While you have everything opened up in the car, route your GPS antenna to the location of your choice. I routed mine to the foot of the passenger side pillar. Connect the GPS to the radio.
- 16. IMPORTANT – there is the passenger airbag indicator which connects to the radio trim panel. Don’t connect or disconnect this if the battery is connected. Not sure what happens, but I heard it’s not good.
- 17. Reconnect the battery and test all functionality. Be sure your lights aren’t on if you have it in accessory mode. I drained my battery farting around too much and it cost me a lot of time.
- 18. If all is working as desired, disconnect the battery, unplug the radio, and connect the air control module and chrome trim to the new head unit. Add the mounting brackets too.
- 19. Transfer any yellow tabs that are needed from the old radio to the dash trim of the new unit.
- 20. Use zip ties and cloth tape to make your wires all pretty. Plan to have the bulk of the excess length deep in the dash so that you have enough lead to work with as you test and install everything.
- 21. Bolt the radio in the dash. Connect the battery and test everything again. If it’s all good, disconnect the battery and reinstall all the trim and various connections.
- 22. Reconnect the battery, and spend a few days playing with the various settings. Continue in this way until the novelty wears off. Should take a good long while.
- 23. CONGRATULATIONS!
Tech support added that it’s all just plug and play. For the most part it is, but it took me quite a while to get things sorted out. Let’s walk through it. First, we disconnect the negative cable from the battery. It’s the one on the right – 10mm
Next we work on the dash disassembly. There are a few YouTube videos that illustrate this well. Use your trim tool to pop the passenger side to where you can get your fingers behind it, and keep going until it’s free. Unplug the grey hazard light connector. You could work with this piece mostly detached, but I had wanted to also polish the lens of the instrument cluster, so I took out the whole of it and set it in the back seat.
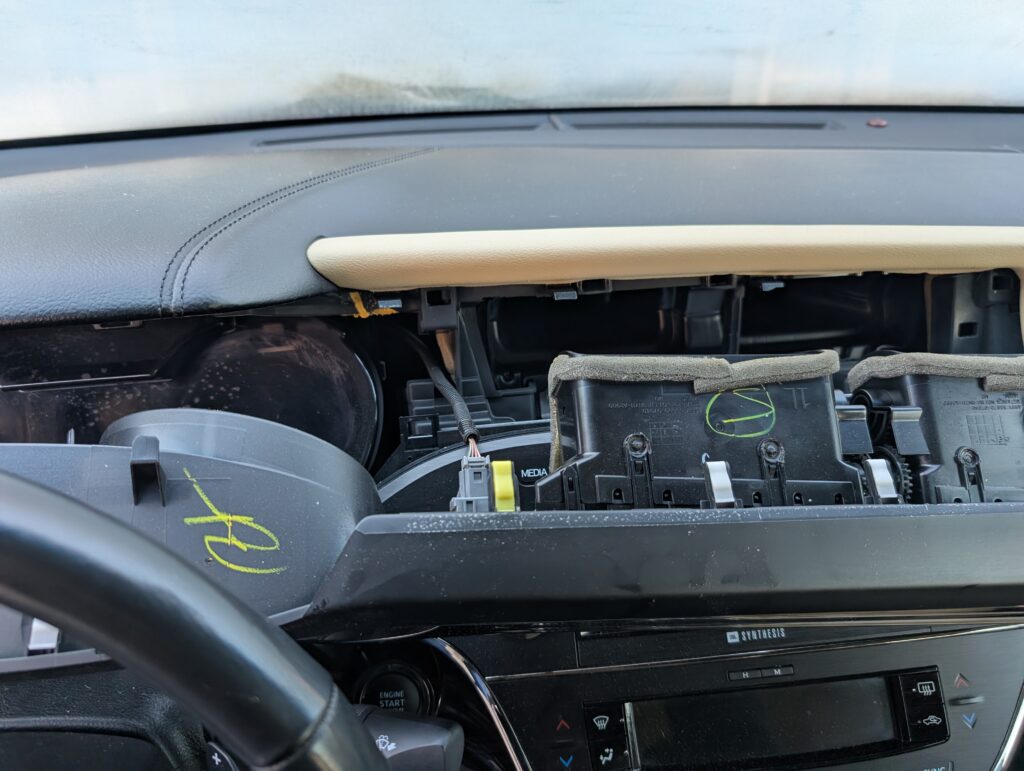
You’ll need to remove those two 10mm bolts you see there, below. Don’t drop them down behind the radio. Just sayin’.
Above the center console, there is some trim held in with clips. Just pull straight back and it’ll come out, revealing this behind it. There’s a connector you have to unplug, but it was easy. There’s another one a bit further back. Unplug that one too. This will give you access to two more 10mm bolts. You’ll see them holding the radio in from the bottom. Also 10mm.
Now with the radio brackets unbolted top and bottom, work the radio out from the dash. Be sure to put down towels to protect your interior. You can see all of the original plugs going into the old unit. Unplug all of those. No need to keep track of them. The integration harness with the CANBUS interface module has matching connectors, so you can’t get it wrong.
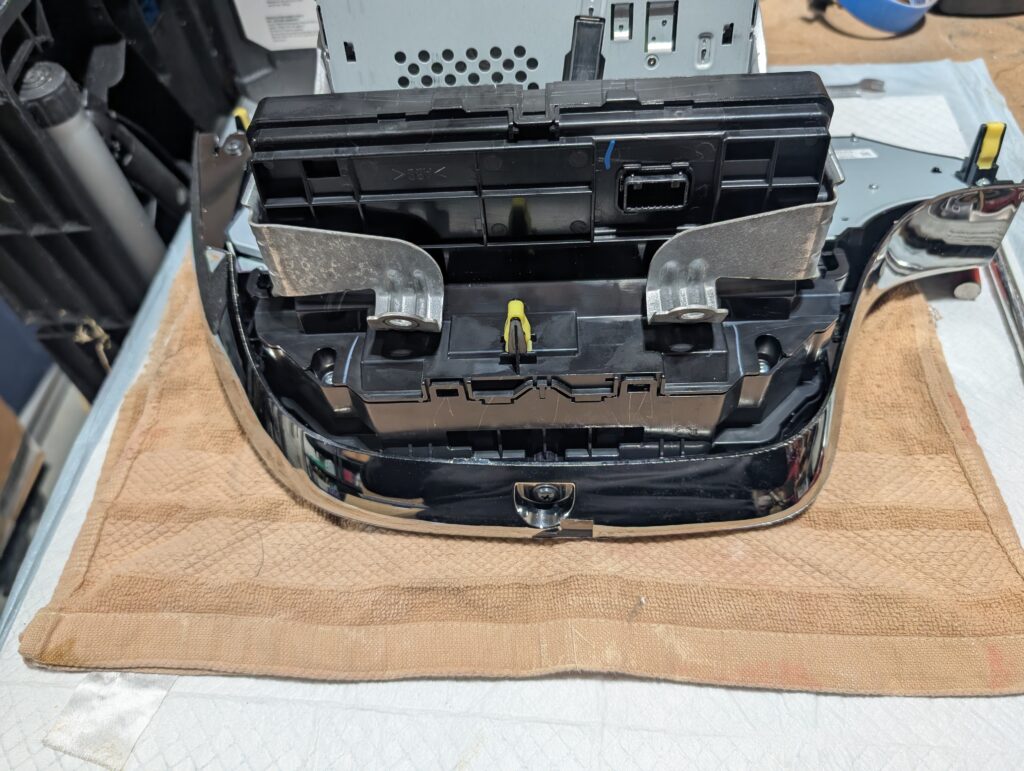
Remove the radio from the car, and set it face down on a soft surface. We’ll take off this chrome trim next. In the image below, at the top left, there is a screw at the end, another screw at the center bottom. On the right, there is a yellow trim plug, so pull down and it will release the trim as a piece. Set it aside. Next, remove the left and right metal brackets. To remove the air conditioner controls from the radio portion of the assembly, slide the part to the right and it will come free of the radio.
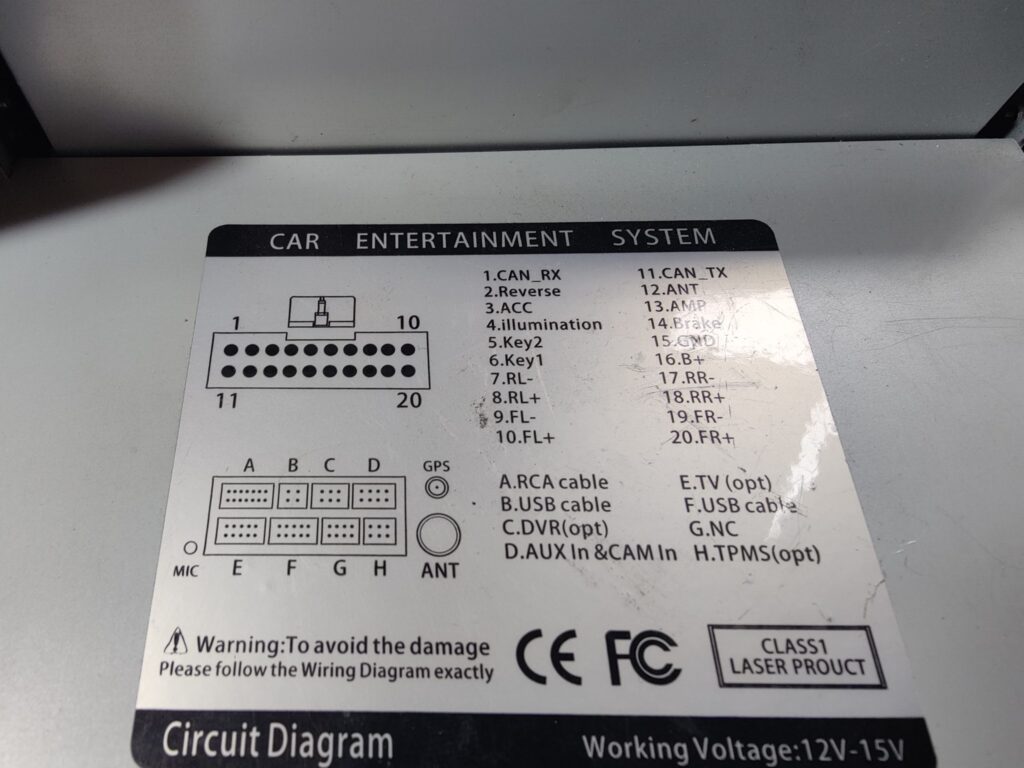
THIS IS NOT RIGHT. The brown plug should be the yellow RCA plug with the white connector that doesn’t have red and white wires. The six pin yellow USB cable doesn’t work there. I was very frustrated with this step, because Belsee didn’t give any port mapping, even when I repeatedly asked. Plug and play my ass. Don’t take that out of context.
The head unit is the PX5, so I scrubbed through other Chinese head units looking for a match. This diagram is the closest I found, but can’t attest to accuracy. I do know that the USB in position C didn’t work as a USB so I took it out of my install.
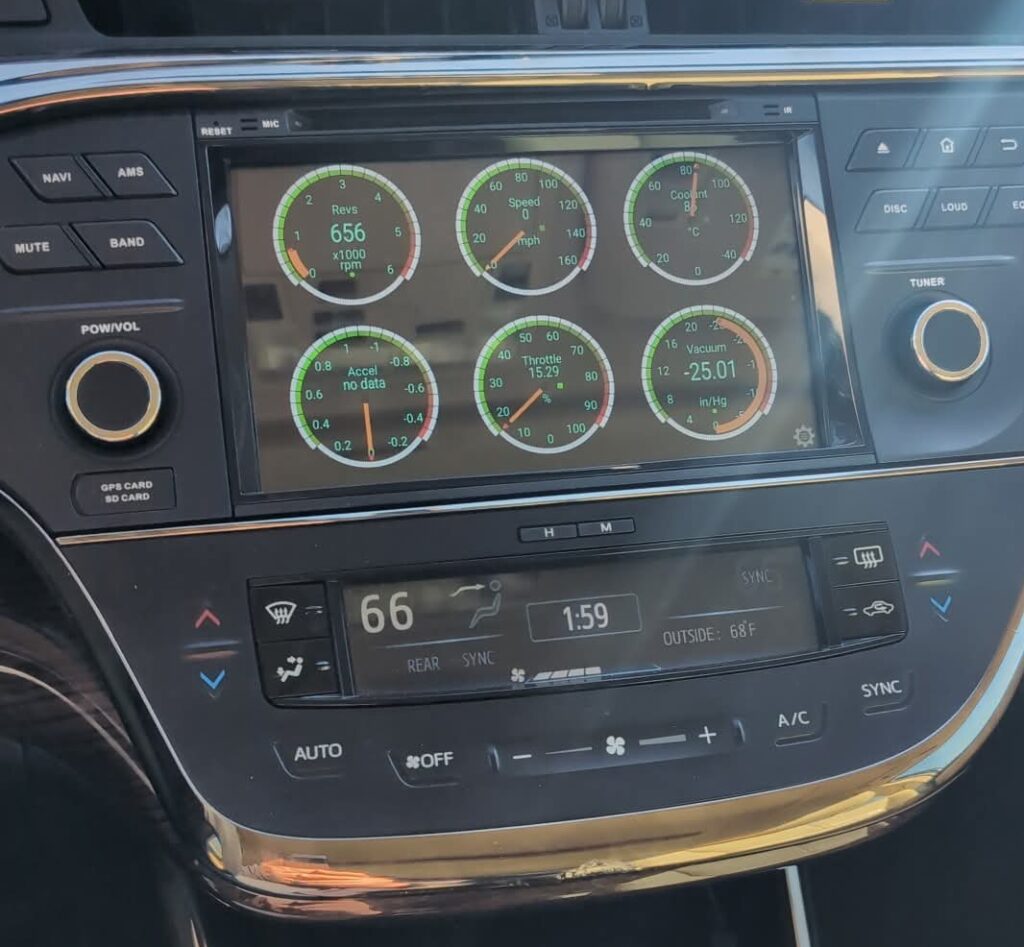
I plugged in an OBD-II dongle and installed the Torque app to read codes and real-time information. Gauges are looking sharp.